Originally this tutorial was written and posted on www.ijwebsites.com. At the time I wrote this I was using Poser 5 but it will pretty much work for any version of Poser from 5 to 7 (there may be some slight differences).
On with the tutorial…
Step 1. Place a figure or a head or something you want to grow hair on in the scene.
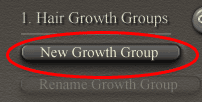
Step 2. Click the Hair Tab.
Step 3. Click the “NEW GROWTH GROUP” button. A small window will pop-up with the name of the group you are creating, it is called Hair_1. For the example, lets keep it with that name and just click OK.
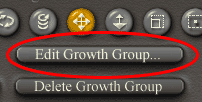
Step 4. Tell Poser where to grow the hair.
Click the Edit Growth Group button. Two notable changes take place. The Group Editor window opens up and the model in our view turns completely grey. This means that there are no polygons selected in the group Hair_1.
We now have to select some polygons to tell Poser where to grow the hair.

Step 5. Right now we have the “ADD TOOL” selected (the add tool is circled in red) in the Group Editor window.
To tell Poser where to grow the hair just left click a part of the head. The polygon will change from dark grey to a cool red color.
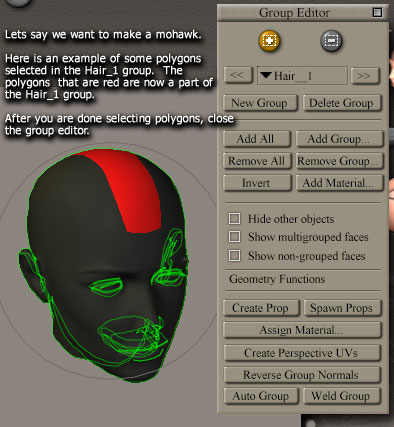
Step 6. All you have to do is select a series of polygons right down the middle of the top of the head toward the back.
This is a very simple example of a hair style which makes it excellent for this beginner tutorial in using the hair tool.
Step 7. Here comes the fun part!
After you added the polygons to the group, close the Group Editor pop-up window.
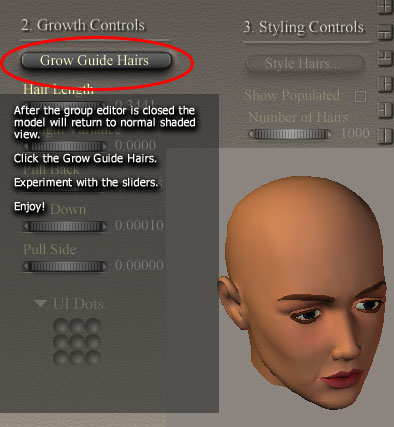
The figure returns to its normal shaded selected style.
Click the Grow Guide Hairs buttons and TADA! you’ll see what looks like only a few strands of hair.
This is not the case. If you start with the default settings then you just created 1000 strands of hair!
If you want to get a quick glimpse of what the hair looks like click the “SHOW POPULATED” box. WOW, that really filled in the hair!
Try a test render.
Now after you see that the default setting aren’t all that interesting you’ll want to play with the sliders a bit to get the hair to stick straight up and maybe bend a little bit pointing towards the back.
The next image will show you what i created in less then 5 minutes.
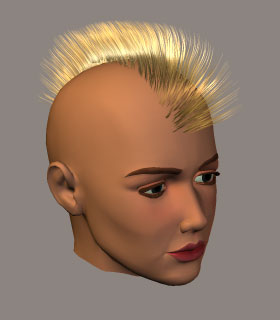
Here is the mohawk i made in less then 5 minutes.
There are other steps you could have done to get a better overall look for the hair, such as adding a skull cap. The skull caps I found are good because they give a nice solid base color to the scalp. This is good if you are looking to make nice, thick healthy hair and you aren’t planning on doing too much post work.
Got a Poser, Vue, or Lightwave question? Email me.